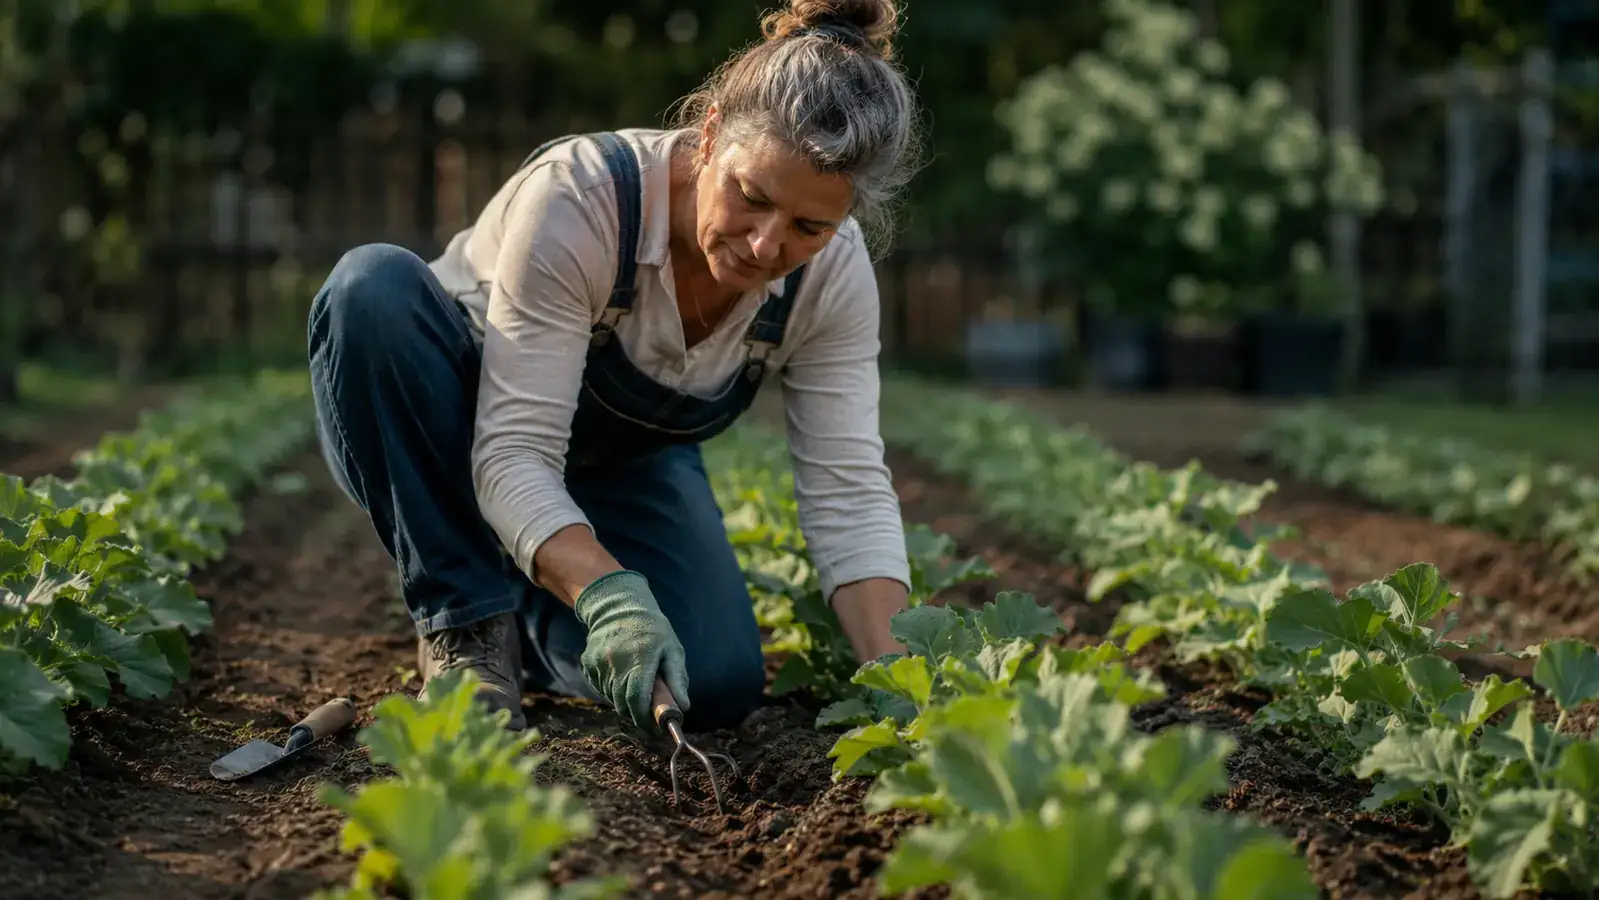
I used to spend an entire Saturday planting a single raised bed. Not because I had a lot to plant, but because I was doing it wrong. I was using a cheap plastic trowel that flexed every time I hit resistance, a cultivating fork that lost a tine in April, and my bare hands for the weeding sections that made me want to go inside and never come back out. By the time I finished, my back hurt, my knees were complaining, and half the plants had gone in slightly crooked because I was rushing to be done.
Here is what changed everything: I switched to the ZUZUAN 3-piece aluminum garden tool set and stopped treating hand tools like they were all the same. A trowel is not just a trowel. The angle you hold it, the depth you aim for on the first push, and whether the blade can hold its shape against clay soil matters more than any tip I ever read online. Once I started pairing the right technique with a solid set, my planting sessions went from full-day slogs to genuinely enjoyable two-hour mornings. I am going to walk you through exactly what I do, step by step.
Still wrestling a bendy plastic trowel through clay? This is the set I finally switched to.
The ZUZUAN 3-piece aluminum garden tool set includes a hand trowel, transplant trowel, and three-tine cultivator, and it is rated 4.7 stars by over 3,600 gardeners on Amazon. Heavy-duty aluminum heads that hold their shape, ergonomic handles, and depth markings on the trowel blade. It is the exact tool set I used for every step described in this guide.
Amazon Check Today's Price on Amazon →Step 1: Loosen the Whole Bed Before You Plant Anything
This is the step most people skip, and it is the reason they fight every step that comes after. Before a single seedling goes in the ground, break up the top six inches of soil across the entire planting area. Not just where the holes will go. The whole bed. Roots spread outward as they establish, and if they hit a wall of compacted clay two inches out from the planting hole, the plant just sits there and sulks.
Use the three-tine cultivator for this, not the trowel. Hold it the way you would hold a comb, tines pointing down, and drag it toward you in overlapping rows. Apply steady downward pressure while pulling, and keep the tines at about a 30-degree angle to the soil surface. You want to feel the soil break apart and lift slightly rather than just scratch the top layer. In heavy clay, plan on two passes before the soil feels genuinely loose. That extra pass takes maybe three minutes per bed and makes every subsequent step easier.
If your soil is bone dry and cracking, water the bed lightly the evening before and let it settle overnight. Loosening soil with a little moisture in it takes half the physical effort of fighting dried-out clay. This small bit of planning saves a lot of shoulder strain. The ZUZUAN cultivator holds up well for this kind of break-up work because the aluminum tines keep their shape under real downward pressure, unlike the cheap stamped-metal versions that slowly splay open after a season.
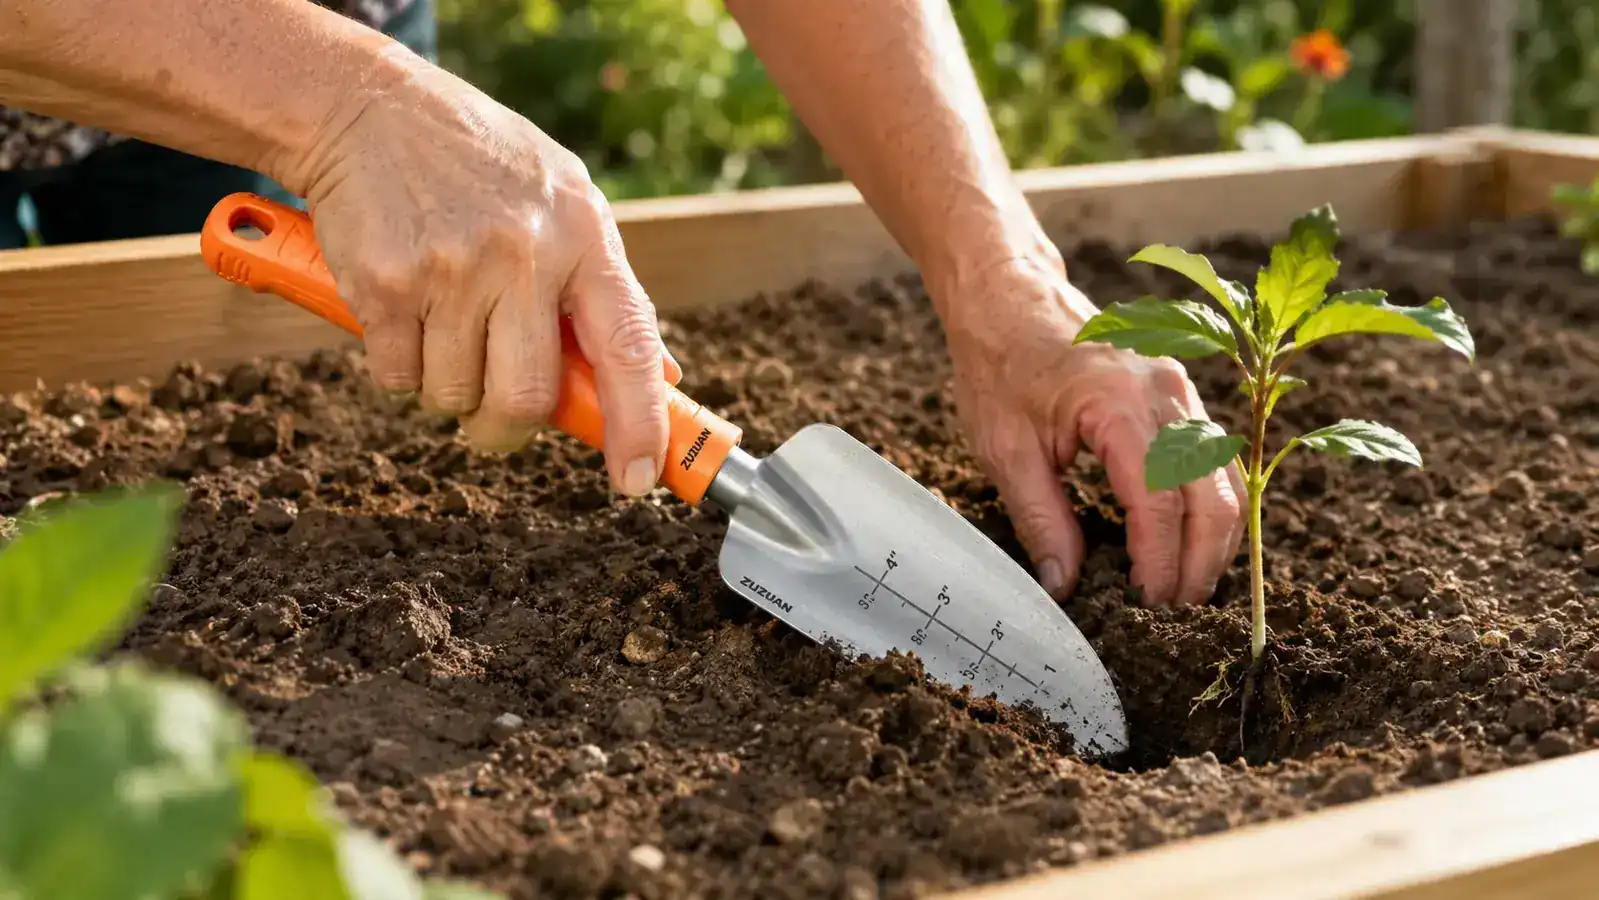
Step 2: Dig Your Planting Holes at the Right Depth on the First Try
Here is a habit that sounds obvious but took me embarrassingly long to develop: use the depth markings on the trowel blade to measure, not your eye. Most annual seedlings go in at two to three inches. Transplants with established root balls from nursery pots go deeper, typically four to six inches depending on the plant. If your trowel has inch markings etched into the blade, you never have to guess, and you never have to waste time backfilling a hole you dug too deep or re-digging one that was too shallow.
The technique I use is what I started calling the slice-and-lean. Press the trowel blade straight down to your target depth marking, then lean the handle toward you to open the soil. Do not scoop in a circular motion the way most people do instinctively, like you are serving ice cream. That method packs the sidewalls tight and makes it hard for roots to spread laterally. The slice-and-lean opens a clean V-shape that the root ball drops into naturally without forcing. Drop in the plant, pull the trowel straight out, and press the surrounding soil back in from both sides with your fingertips.
One more thing on spacing: lay out all your holes before you dig any of them. Measure and mark first, then go back and dig. Adjusting spacing mid-row while you have a seedling sitting out of its pot means you are rushing and things go in at odd angles. Lay it all out, then dig. It adds two minutes up front and saves ten minutes of fixing later.
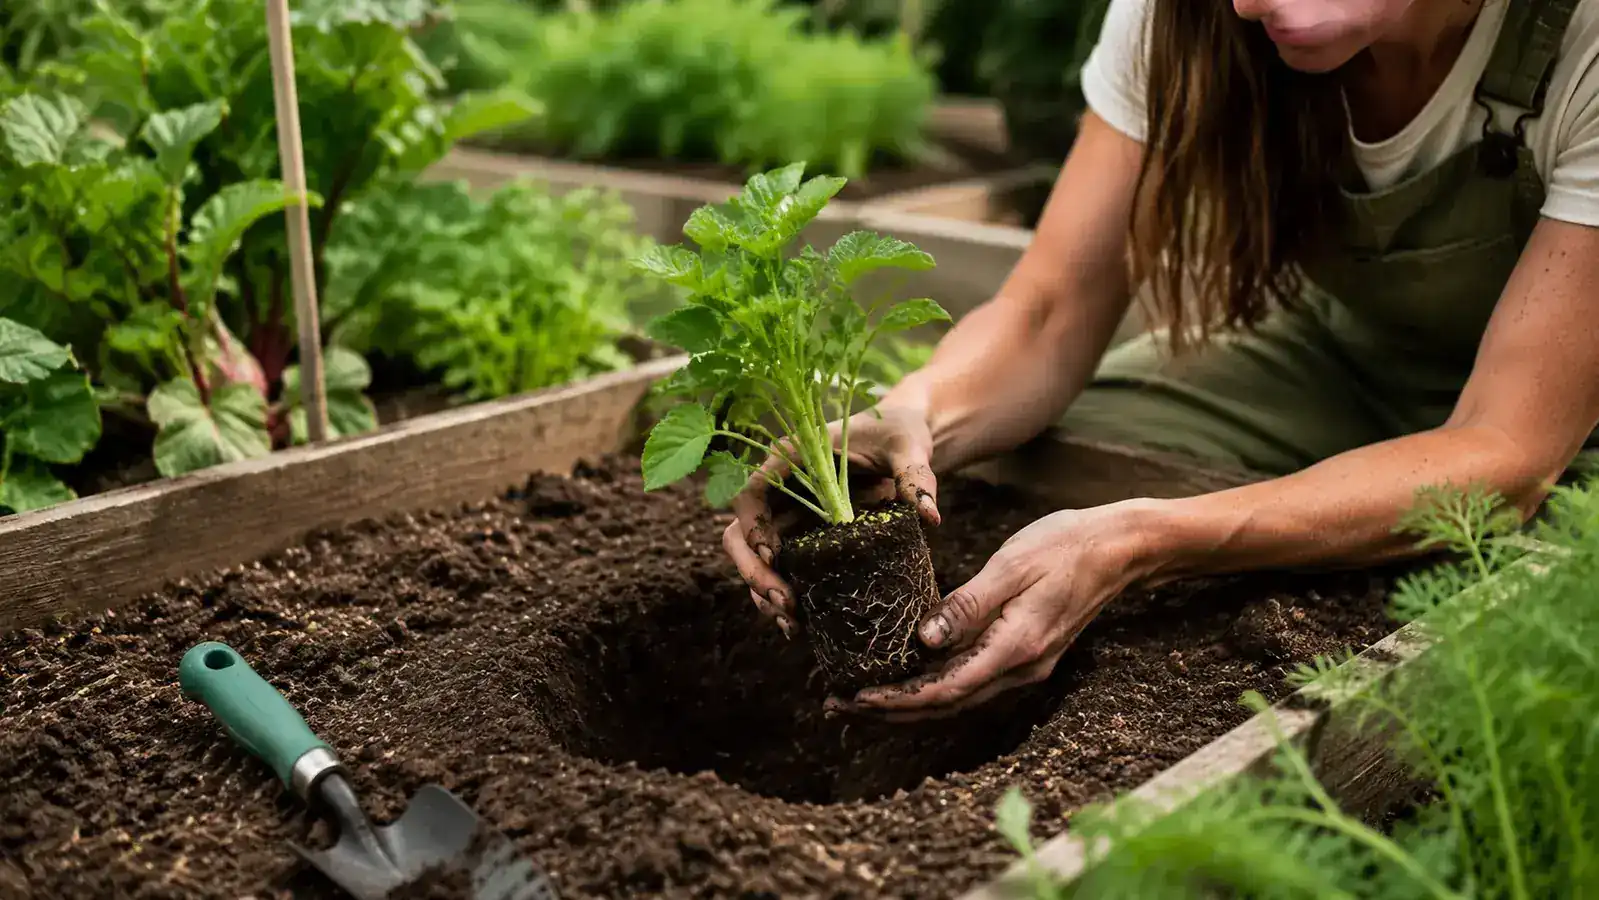
Step 3: Use the Transplant Trowel for Root Balls, Not the Wide One
The three-piece set comes with a narrow transplant trowel and most gardeners ignore it entirely. They reach for the wide trowel for everything and then wonder why seedlings keep coming out of their cell trays with the root block crumbled. The wide blade is too blunt to slide cleanly down the side of a six-pack cell. It breaks the root block when you lever it up, which sets the plant back a week while it recovers.
The transplant trowel's narrow blade is designed for exactly this job. Push it straight down alongside the root block in the cell, tilt it slightly toward you to break the suction at the bottom, and lift straight up. The root block comes out intact with the roots held together. That intact root mass means the plant starts drawing water and nutrients almost immediately after going in the ground rather than spending its first ten days trying to sort out what happened to its roots.
For nursery-pot plants, squeeze the pot sides to loosen the root ball first, then use the transplant trowel to score around the inside edge of the pot before tipping it out. It prevents the kind of root tearing that you would not even see but the plant definitely feels.
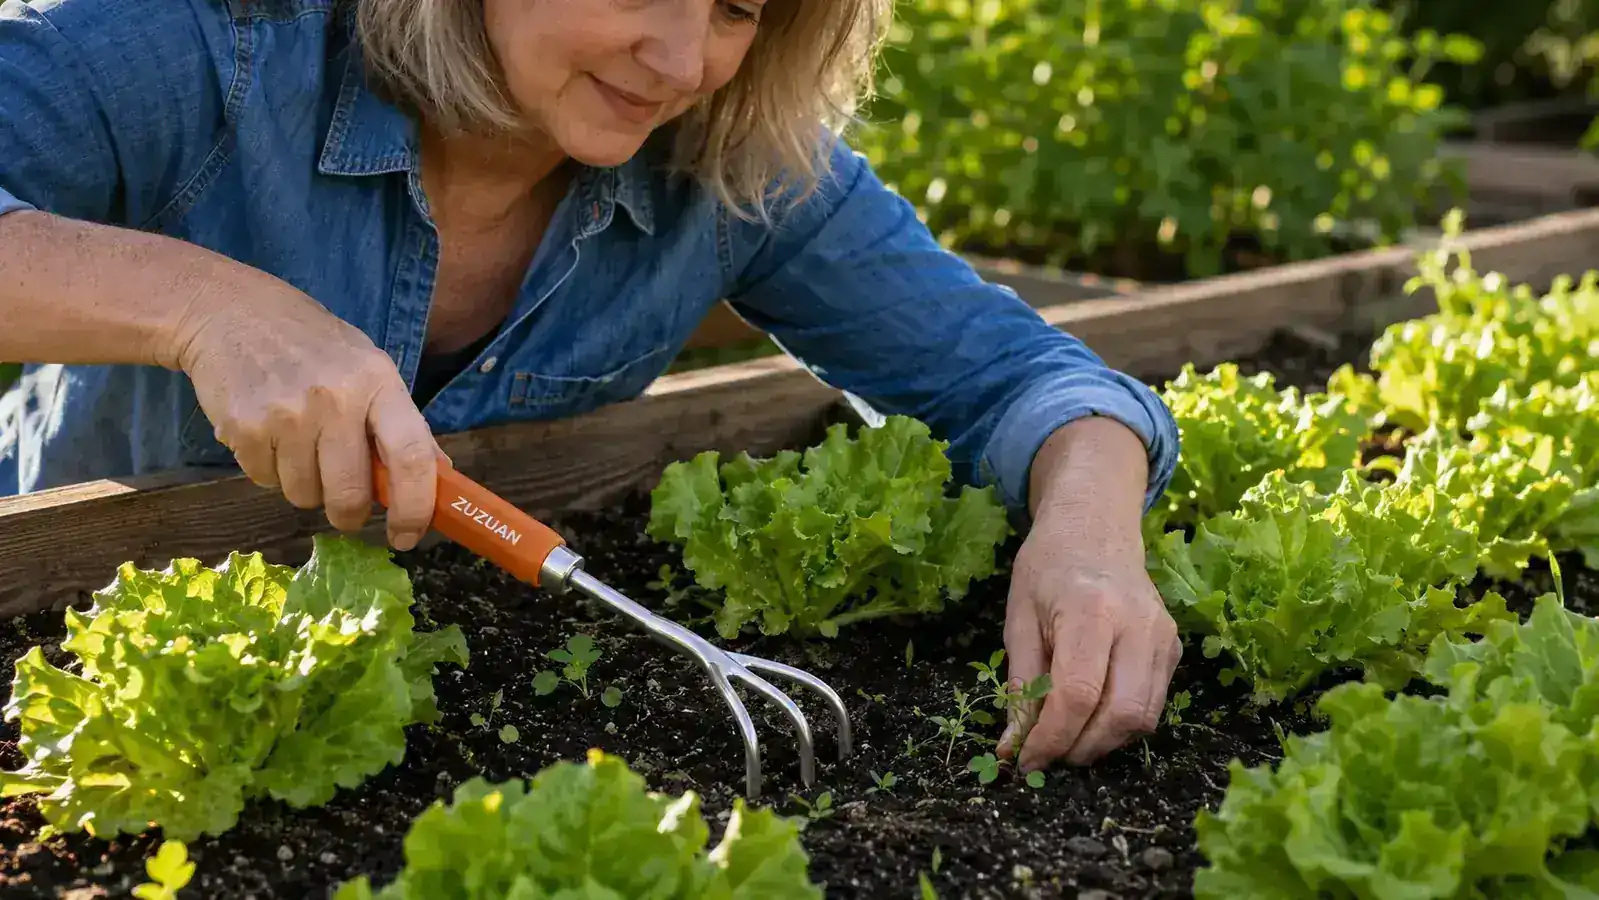
Step 4: Weed as You Go, Section by Section
The biggest time trap in a planting day is saving all the weeding for the end. By then you are tired, your knees have been at it for two hours, and weeding feels like penance. The faster system is simpler: weed one section, plant it, move to the next section. You stay in motion, the soil is already loose from Step 1, and the weeds come out cleanly instead of pulling from packed ground.
For shallow-rooted weeds like chickweed, hairy bittercress, and annual grasses, the cultivator handles removal without any individual pulling. A shallow pass at one to two inches depth severs them just below the crown. Leave them on the soil surface for a day and they desiccate. For tap-rooted weeds like dandelion, dock, or bindweed, switch to the trowel and slice straight down alongside the root before levering it up. Yanking a dandelion by its leaves just snaps the top off and the root stays in the ground, ready to re-sprout in two weeks.
Weed one section, plant it, then move to the next section. By the time you finish planting, you are done weeding. It sounds simple because it really is.
A note my neighbor Diane shared with me years ago, and she has been gardening the same half-acre for over 30 years: any weed that has formed a seedhead does not go in the compost bin. It goes in a bag and out with the trash. Composting a seeding weed just means those seeds survive the pile and come back with your compost next spring. I did this without knowing for three years before she said something.
Step 5: Settle the Roots and Water Gently Without Undoing Your Work
Once everything is planted, run the cultivator one final time between the rows at about an inch deep. This breaks the surface crust that forms when you have been kneeling on the soil edge, and it opens the surface so water penetrates rather than running off. Then water slowly. A hard blast from a hose nozzle knocks small seedlings sideways, washes fine soil into a crust around the stem, and does most of its watering on the surface rather than getting down to the root zone. A gentle flow held at the base of each plant for five to ten seconds goes where the roots are.
After the initial soak, press the soil around each seedling gently with two fingers. You are checking for air pockets, which are invisible from above but cause wilting even when the surrounding soil seems moist. Roots that are surrounded by air pockets dry out from the sides even if water is present a few inches away. Thirty seconds per row, done once, is all it takes.
If you are adding mulch, do it now while everything is freshly watered. Two inches of straw or shredded leaves holds moisture in, reduces how often you need to water, and suppresses the next flush of weed seeds. Pull the mulch back an inch or so from each plant stem so air can circulate at soil level and you avoid the crown rot that mulch-against-stem causes on tomatoes and peppers specifically.
What Else Helps
A kneeling pad is not optional if you are doing a full planting session on compacted or rocky ground. Your knees will make their position on this very clear. I also keep a small hand bucket within arm's reach for pulled weeds so I am not standing up and walking to the compost pile every few minutes. Small friction reductions like those add up to real time savings over a long morning in the garden.
Label your plants the moment they go in the ground, not when you think you will remember to do it at the end of the session. I use plain wooden popsicle sticks and a permanent marker. They are inexpensive, they survive a full season outdoors, and they have saved me from the mystery-seedling problem more times than I can count.
Finally, rinse your tools before you put them away. A 60-second rinse and a quick dry with an old rag prevents surface rust from forming, including on aluminum-headed tools that still have steel bolts or connector points. The ZUZUAN set has held up through two full seasons for me with nothing more than this basic rinse-and-dry treatment after every heavy session. If you want to dig deeper into what makes aluminum construction the right choice for hand tools that will actually last, our guide on why aluminum garden tools outlast cheap plastic sets covers all of it. And if you want to see how the ZUZUAN set specifically performed across an entire growing season before you commit, the long-term review has the full story.
A solid hand tool set pays for itself the first time you do not have to re-dig a collapsed planting hole.
The ZUZUAN 3-piece garden tool set (hand trowel, transplant trowel, cultivator) earns 4.7 stars from over 3,600 Amazon gardeners. Heavy-duty aluminum construction, ergonomic comfort-grip handles, and trowel depth markings so you plant at the right depth the first time. It is the tool set I used for every step in this guide and the one I would buy again without hesitating.
Amazon Check Today's Price on Amazon →